Some of you might be wondering what in the world Threadcakes is. Well there's this fun site where they sell shirts called Threadless and a couple of years ago Chris Cardinal started a cake contest based on shirts from Threadless. They've been doing Threadcakes for the past couple of years and this is the very first time Ai and I have decided to enter. You all should enter too! It's tons of fun and there are soooo many fun and cute designs to choose from! You can see our entry over here!
Since it's an online cake contest we had to take a ton of pictures to document our whole process. Which is really great for all of you because we're finally doing a proper cake blog. We'll walk you through our process from start to finish!
The cake was red velvet with cream cheese frosting. I know I've mentioned it a ton in past blogs but I really do love allrecipes.com! My red velvet and cream cheese frosting recipe are from there.
Red Velvet Cupcakes
Ingredients
- 1/2 cup butter
- 1 1/2 cups white sugar
- 2 eggs
- 1 cup buttermilk
- 1 fluid ounce of red food coloring
- 1 teaspoon vanilla extract
- 1 1/2 teaspoons baking soda
- 1 tablespoon distilled white vinegar
- 2 cups all purpose flour
- 1/3 cup unsweetened cocoa
- 1 teaspoon salt
Directions
- Preheat oven to 350 degrees F (175 degrees C). Line muffin pans with 20 cupcake liners.
- In a large bowl, beat the butter and sugar with an electric mixer until light and fluffy. Mix in the eggs, buttermilk, red food coloring and vanilla. Stir in the baking soda and vinegar. Combine the flour, cocoa powder and salt; stir into the batter just until blended. Spoon the batter into the prepared cups, dividing evenly.
- Bake in the preheated oven until the tops spring back when lightly pressed, 20 to 25 minutes. Cool in the pan set over a wire rack. When cool, arrange the cupcakes on a serving platter and frost with desired frosting.
*I modified this recipe by doubling it and baking it in a 9x13 glass pan and baking it for 40 minutes.

Cake ingredients

I just love the color of red velvet!
Cream Cheese Frosting
Ingredients
- 2 (8 ounce) packages cream cheese, softened
- 1/2 cup butter, softened
- 2 cups sifted confectioners' sugar
- 1 teaspoon vanilla extract
Directions
- In a medium bowl, cream together the cream cheese and butter until creamy. Mix in the vanilla, then gradually stir in the confectioners' sugar. Store in the refrigerator after use.
* This cream cheese frosting might not be for some of you as it has a strong cream cheese flavor. It isn't overly sweet and tastes different from the stuff you buy from the grocery store.

Frosting Ingredients

Yummy cream cheese frosting!
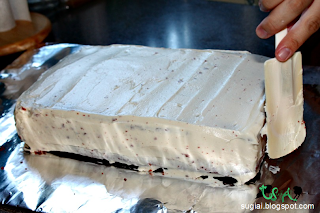
The cake covered in a crumb coat or like Buddy from Cake Boss likes to say it's been "dirty iced".
To make the characters and cover the cake we used our go to marshmallow fondant recipe.

Marshmallow fondant ingredients and food markers and brushes

I like to start the marshmallow fondant out in my KitchenAid stand mixer and then finish it off by hand kneading it.

The fondant all ready to go!
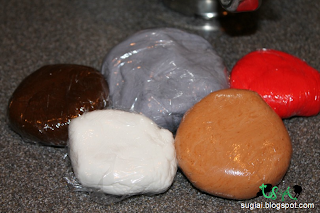
All the colors we needed for the cake.
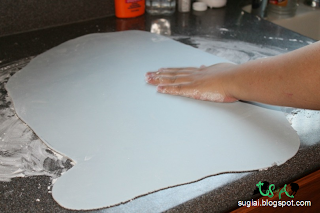
The fondant that covered the entire cake.

The cake all covered with the excess coming off.
To make Han Solo (red solo cup) we cut the fondant free handed with an xacto blade. We probably should have printed out the design and traced over it to get cleaner lines, but it didn't come out too bad.

The bulk of the cup. We had to redo his belt in the end because it ended up cracking when we moved it on to the cake.

Han Solo cup just hanging out!

Close-up shot of Han Solo cup.

Gun and face details.

Clothing and shoes details.
The Chewbacca cookie was also free handed, but his body was sculpted to give him more of a cookie shape. His facial features and belt were also made from fondant. The shading done on him was painted on with brown gel food coloring and vodka.

Chewbacca cookie's beginning.
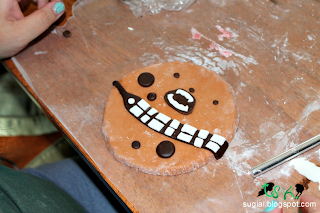
He's got his face on. I actually had to carefully remove his face because I realized his belt wasn't at the proper angle.

Now he looks like a real chocolate chip cookie! Ai's painting skills are amazing!

Close up of Chewbacca cookie!

Face and belt details
As a blog exclusive we made and Millennium Falcon! It was actually part of plan B because we weren't sure how much negative space we were going to end up with. I ended up sculpting Chewbacca really big which ended up being a good thing since the Falcon isn't actually a part of the shirt design. But Ai worked so hard on it and it ended up being so cute I just have to share it with you guys!

Our secret Millennium Falcon!
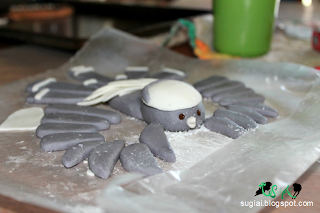
The start of our Millennium Falcon! We thought we were so clever for making an actual falcon! hahahaha

Some more detail added
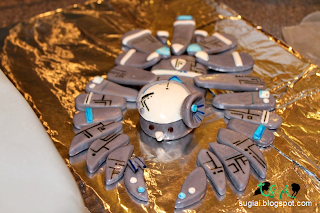
The Millennium Falcon's final and wonderful look!

Sometimes it hurts to destroy something you've worked so hard on, but that's what cake is for!
We had so much fun with this contest and we're planning on entering again before it's over since Ai's birthday is next month! Hopefully we win our category or at least place! But no matter what we really enjoyed doing this contest!♥
